Create
a New Visualisation.
OR
Select an Existing
Visualisation.
Click  .
.
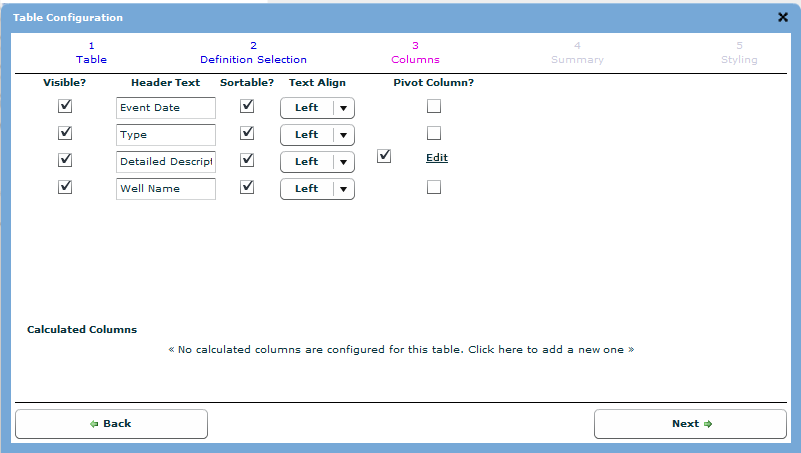
The Table Configuration dialog opens.
Tip: This acts a wizard to help all the necessary
table properties.
Click the Columns
tab.
Enable the Pivot
Column option for the necessary column.
The Transposition Configuration dialog opens.

Enable the Include
All Possible Values if the column being pivoted uses a lookup
the other column types do not use. When enabled this option pulls
all the possible values from the lookup created as the column. The
column set would be consistent; however, many of the values may be
0. If disabled, only the values in the current dataset will be created
as columns.
Note: This option does not appear in all
pivoted columns.
Enable the Short Values if the column being pivoted uses a lookup the other column types do not use. When enabled this option the code will be used as a header and saves space but reduces the ability to identify each value. If disabled, the entire label will be used as the column header. This takes up space; however, each column is clearly shown.
Select the Target
Value from the drop-down list. This value selects the column
from the data for new columns.
Note: Only numerical columns can be selected.
Select the Function Applied from the drop-down list. This value is used to select the function the pivot will apply when multiple items from the Target Value exist for one column.
Click in the Current Grouping
areas to create a grouping if no grouping is currently applied.
Note: For the pivot to work, there must be
at least one grouping applied to the data.
Select the group from the drop-down list.
Click  to add additional groupings.
Repeat steps 11 and 12 until all the necessary groupings are added.
Click  .
.
The Transposition Configuration dialog closes
and the parameters are added to the pivot column.