In the Master Equipment List,
click  .
.
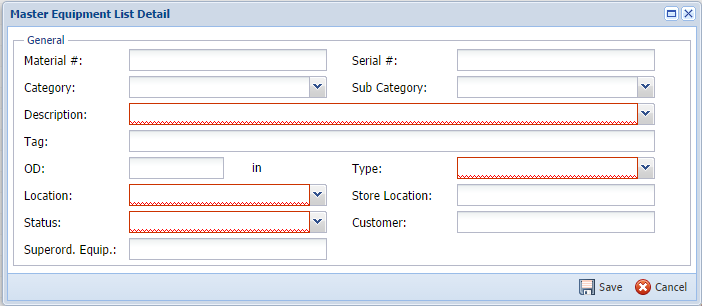
The Master Equipment List Detail
dialog box opens.

Manually add new one item of equipment to PlanNet to allow for scheduling in the project tasks.
Note: You can only add one item of equipment at a time when using this feature. See Import CSV (Master Equipment List (MEL)) to add multiple equipment simultaneously.
Steps
In the Master Equipment List,
click  .
.
The Master Equipment List Detail
dialog box opens.

Type the personnel Material # (number) for the newly added equipment.
Select the Category
from the drop-down list.
Note: The categories are determined
by each organization.
Select a Description of the newly added equipment from the drop-down list.
Type the Tag
of the newly added equipment that describes the equipment.
Note: The Tag automatically
populates when the Description is selected. The Tag can be edited.
Type the Outside Diameter (OD) in inches of the newly added equipment.
Select the Location
where the newly added equipment will be housed from the drop-down
list.
Note: This Location drop-down
list uses the data added in the Warehouse list.
Select the Status availability of the newly added equipment from the drop-down list.
Type the Superord. Equipment (Superordinate Equipment) classification that relates to the newly added equipment.
Type the unique Serial
# (number) for the newly added equipment.
Note: The serial number
is an individualised identifying number.
Select the Sub
Category from the drop-down list.
Note: The subcategories that
relate to the categories are determined by each organization.
Select the Type of the purchase state for the newly added equipment from the drop-down list.
Type the known Store
Location for the newly added equipment.
Note: The Store Location is
based on the previously selected location.
Type the Customer the newly added equipment will be used, if applicable.
Click  .
.
The new equipment is added.